This Build diary and Comments from the now closed Brisbane Cyclist website, 2015.
September 22, 2015
For something to do, I thought I might keep a build diary of the M5, out of interest sake and so maybe someone can stop me if I’m about to commit terrible things. So here goes…..
The bike arrived on Monday, so I’m calling it day 1 even though not much happened!
Day 1.
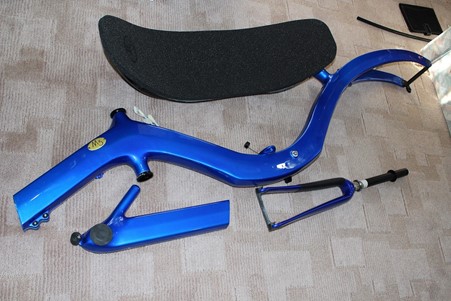
Unpack it and sit and look. It’s a piece of art. My significant other does not agree. It looks just like the other one, she says. Except it’s blue.
Sigh.
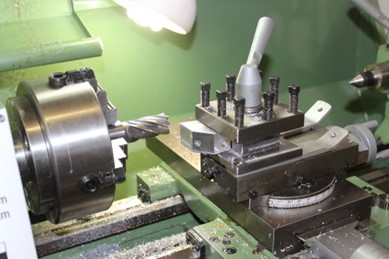
First step for me is to mount the front brake. I want to place it behind the fork, so the cable is on the bike’s left. I’ve had a mount part machined for a while just waiting for the fork to arrive, task 1 was to machine the front face to match the fork, followed by drill and tap the mount hole. Looks like it will work, a successful evening I call it. Still have some machining to do, and find a shorter bolt.
Day 2.
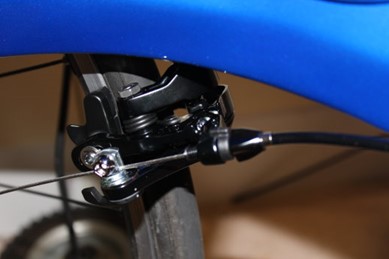
I’ll back up a bit and say I’ve been planning this for a while, collecting bits here and there so it will be a bit of an eclectic build. Mostly Shimano 105, but a sprinkling of other bits. Of course, collecting in advance means some of the parts aren’t quite what might have been best. The brakes are a case in point. To clear the chain on the right of the bike, it is best to have the brake cable on the left. These days the standard production bikes have the brake cable on the right of the front brake. There are special ones around, like Bacchetta and M5’s own design, but I don’t have them. My home solution is to mount the front caliper on the back of the fork, with the cable entry from below – the cable loops down and back up.
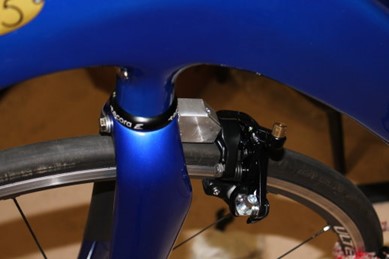
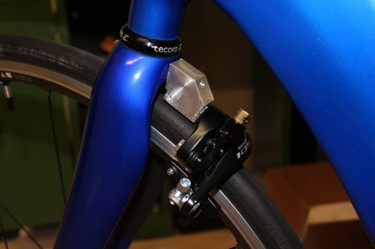
I will paint it when I have been riding and proved the concept. Might make it a bit less “chunky” too.
Also called in to the local bike shop and collected the BB bearings, brake cables, and the expanding plug to go in the carbon fork instead of the star fangled nut.
Comment by David on September 22, 2015 at 8:39pm: Ooooh, this is exciting! Great set up with the lathe. I can’t remember ever seeing one used as a milling machine. Probably because we had milling machines, but I like your thinking 🙂 PS. Love the colour. I’ll show my wife.
Reply by JamesD on September 22, 2015 at 8:53pm: There’s going to be some interesting bits along the way. Things like the brake levers, because I’m using “road” style (CX levers actually), they don’t come in a small enough clamp diameter for the supplied bars that are MTB size. Easy enough to fix, but not “bolt on” so to speak.
Comment by Melvyn Yap on September 22, 2015 at 10:44pm : I’ll be following your build journey James. Keep them coming! Perhaps it’s the angle of the photo being taken, but it doesn’t look like there’s much room between the tyre and the fork. What tyre width size are you running in that photo?
Reply by JamesD on September 23, 2015 at 4:46am: It’s not the angle of the photo – there’s not much clearance, I drilled the mount hole in slightly the wrong place. If it all works as hoped I’ll make up a second mount with a bit more clearance. 23mm tyres at present, 26 is the max it will take on the back.
Day 3.
I said something about things not fitting? Happily that did not apply to the bottom bracket bearings, they screwed in nice and the crankset is now on. Interestingly Shimano has changed the size of the bearing cups, you now get a special tool to adapt the cup to the old special tool so it can be tightened.
Things that didn’t fit are the brake levers, the handlebar is too small a diameter for the clamp. Again to the machine tools, and a piece of Bunnings tube is skimmed down to match the clamp radius, split and then placed on the bar. When the brake is done up all clamps together satisfactorily.
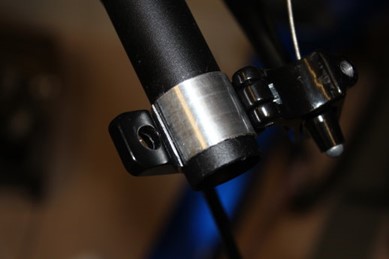
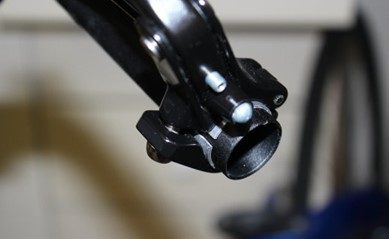
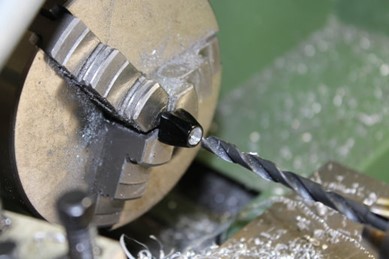
Speaking of brakes, the outer cable ferrule doesn’t fit into the adjuster on the brake caliper. Not an M5 problem, just differing standards. Easy fix with the right tools – drill out the end and away we go.
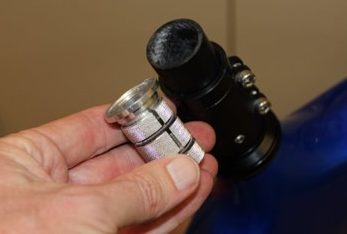
The headset supplied had a star fangled nut, I’m using an expanding plug instead. Much better idea for a carbon steerer I think.
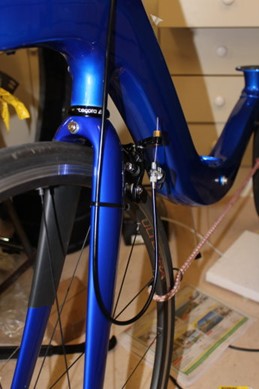
Brakes are cabled up tho lengths not finalised until I can ride and adjust everything’s position. Front brake cable routing thus:
Brakes seem to be working nice.
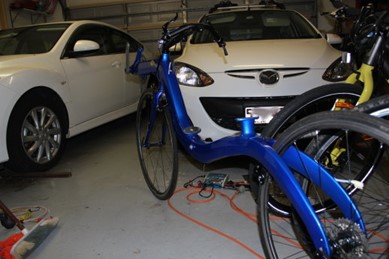
Here it is as we stand so far. Coming up next will be cutting and mounting the seat, and the gear cables etc. But that will be the weekend I think.
Comment by David on September 23, 2015 at 8:53pm: Great photos James. Can’t wait to see the next instalment.
Day 6. (no work on days 4 & 5) 26 September 2015.
Visit to the LBS again today, gear cables, pedals, in line cable adjuster and some odd bits and pieces, and some bar tape. First time I have bought bar tape in decades….
The seat has been the challenge for today, for several reasons. First, there is really no clue as to where to drill the mount holes, nor an easy way to set the distance from the pedals to the seat. Besides that, what reference do you use to set a reclined seat, it’s not like setting the seat height on a normal bike. Luckily I have a recumbent with similar layout, but the seats are different shapes and heights. Worry, worry, and an attack of the nerves……
I’m not the 2.5m tall Dutchman the bike was seemingly designed around, making the seat position even more critical. Bram (M5 owner) had marked the seat with the suggested cut out, which I duly did. The seat mounts with spacers between the seat and the frame mounts, it was very obvious the seat position I was needing it was not going to work with these spacers. A bit of head scratching and a decision was made to make special angled spacers with 2 screws per spacer instead of a long through bolt. The front ones are short and made of aluminium bar, the back ones an engineering grade nylon rod.
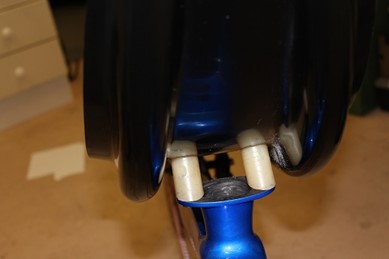
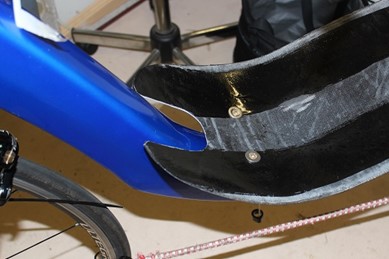
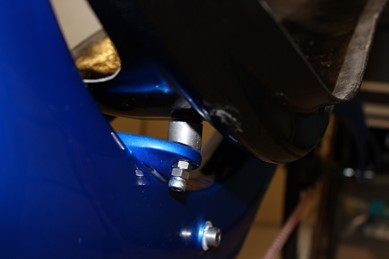
Finally, the seat was mounted and I could slide on and check the pedal reach. YES! I can reach the pedals at bottom dead centre. I can’t tell you how much of a relief that was. The seat angle is about 20 degrees.
With the seat in place I can start to adjust position of bars, levers, boom extension and so on.
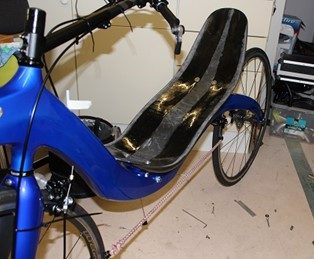
Comment by David on September 26, 2015 at 9:45pm: Excellent James. Can’t wait to see it in the flesh (and the mods … no pressure). It looks fast and it’s only standing still!
Comment by Melvyn Yap on September 27, 2015 at 11:18am: Looking good!! That’s a pretty aggressive seat recline angle, are you intending to install a headrest? What’s the material of that white spacer? Looks interesting
Reply by JamesD on September 27, 2015 at 3:52pm: I have the M5 headrest as well, not mounted yet and I’m not sure how it will work with helmets. Poorly I imagine. I’ve sat on the bike and held the rest in place and it feels good…. without the helmet of course. The spacers on the seat rear mounts are a nylon rod, pretty tough stuff, we use them as drifts for hammering bearings out and similar. One day they will be black…..
Comment by Dirk on September 26, 2015 at 10:00pm: This is a brilliant thread. Thanks for all the effort to share it James. Will be following closely too. You seem to know what you’re doing!
